Not sure where to start when teaching scales? I don’t blame you! There are many different approaches to introducing and teaching scales.
In my time spent teaching and blogging about piano, I have encountered teachers who: introduce scales as they apply to a newly assigned piece, introduce scales as dictated by an exam syllabus, introduce scales in order of the circle of 5ths, introduce scales in order of the keys covered by a method book, introduce scales according to common fingering patterns… it varies drastically, and it’s very much a matter of individual style and teaching preferences.
Every teacher has an approach to scale study that works for them.
But… if you don’t yet know where to start with scales… or if you feel like you’re floundering in the “scale department”, here are 6 tips for streamlining scale study.
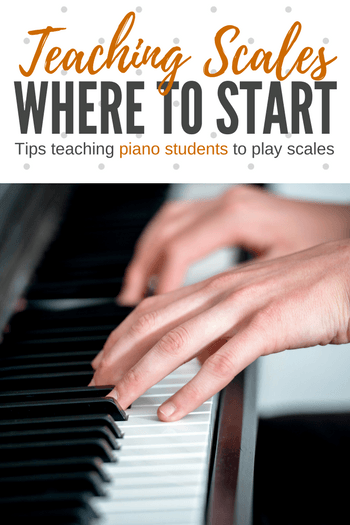
6 Terrific Tips For Teaching Piano Students To Play Scales
1. Begin with the pentascale… but change the fingering
A good way to introduce your young piano students to scales is by beginning with pentascales (the first 5 notes of the scale). However, using the common right hand fingering of 1-2-3-4-5 can cause future confusion when you eventually change to the 1-2-3-1-2-3-4-5 fingering to facilitate an octave scale.
So, instead of using a 5-finger scale, teach your students to play the right-hand pentascale by “tucking the thumb”. This means they end the ascending pentascale on their 2nd finger (if playing a scale that begins on a white key), thus learning to tuck their thumb under their 3rd finger on the ascent plus swing their 3 finger over on the decent.
Once your students have mastered this approach, teach them to play the pentascale in this way with hands together. The left hand is easy as it simply steps up from finger 5 to finger 1, but the right hand is learning the correct fingering for the start of an octave scale. This early muscle memory will be extremely helpful as your students progress with scale study.
2. Drill “scale fingering” away from scales
Give your students the time they need to settle into scale fingering without worrying about accidentals. With a blank piece of paper and a pen you can create some simple fingering drills that reinforce the practice they need, without the worry of “getting something wrong”.
Playing only white keys, and with the understanding that these patterns only move by steps (no skipping… fingers must tuck under or swing over to facilitate the fingering), write out patterns for your students such as:
RH 1 – 2 – 3 – 1- 2
LH 5 – 4 – 3 – 2 – 1 – 3 – 2 – 1 – 4
RH 5 – 4 – 3 – 2 -1 – 3 – 2
LH 1 – 2 – 3 – 1 – 2 – 3 – 4 – 1
Using these types of patterns, challenge your students to see if they can navigate the changes in direction, time them to see how quickly they can complete each fingering pattern, and have them draw their own patterns to challenge themselves. Send one or two fingering patterns home each week on their assignment sheet for drill and practice.
3. Give students the “whole step, half step” advantage
Instead of only having your students memorize the accidentals belonging to each scale, give them the advantage of understanding the whole and half step patterns of each scale. Spend time before introducing a scale by choosing any key on the piano and asking your students to find a whole step or a half step above or below. Next, spend time with short, fun drills such as:
“Start on F# and play this pattern descending…. W W W H”
“Start on Db and play this pattern ascending… W H W H”
After some time spent “playing” with whole steps and half steps, help your students memorize the major scale pattern (W W H W W W H), and then the natural minor, harmonic minor, and melodic minor.
4. Avoid teaching only “easy” scales first
It’s important that piano students do not mentally separate “easy” scales with “hard” scales. In reality, all scales are simply patterns! Take care not to “save” scales such as Db Major until your students are older, as this gives the perception that they are more difficult and more “frightening”. Using your whole step, half step approach and your fingering comfort drills, any key can be tackled by any level of student.
5. Introduce scales in a set order
There is no one “right” order, but it’s important to have some sense of organization when introducing scales. A “willy nilly” approach can create confusion and feelings of negativity towards scales… for example, teaching F major alongside D major could cause fingering confusion.
Choose an approach to scale study… and stick with it. Some teachers choose to introduce scales in blocks that include similar fingering, others prefer the circle of 5ths, while others prefer black key patterns. In the comments below we’d love for you to share the order in which you introduce scales… and why!
6. Bring relevance to scales
It wasn’t until one of my students sighed and said, “Why do I have to learn these.. I never use them when I’m playing…” that I realized that I needed to make scales immediately relevant to my students. Not every piece will have an obvious “sontatina-style” scale smack dab in the middle, but this doesn’t mean that scales aren’t relevant.
Before staring a new piece, talk about the scale upon which the piece is based. Find parts of the scale within the music (places that step, places that skip or leap but still outline portions of the scale, the tonic and dominant notes, accidentals that are leading tones or are from the harmonic minor scale etc.) Highlight these parts to show your students how useful scale knowledge can be.
6 (and a half). Continue the Relevance With Creativity
As you teach scales, provide opportunities to use them in improv activities Try playing a simple yet “catchy” accompaniment in a specified key while your students play a pre-determined rhythm “on the tonic and dominant” or “using the first 4 notes of the scale only”. You can do the same with composing activities (“Let’s create a motive using the first 4 notes of the scale!”).
Through this dual approach to relevancy (“score study scale hunting” and “create music using scales”) you not only reinforce your students’ ability to play the scale, but also their understanding of why we need to know scales in the first place!
Teaching Technique Takes Time…
Teaching technique takes time… however, the time you and your students will save in the long-run is invaluable! You’ll avoid weeks of incorrectly practiced scales, lessons filled with fixing fingering, and months of drilling key signatures. It is much more efficient to take the time to teach technique throughly in the beginning than to spend time correcting and reviewing after the fact.
Thinking “YES!” but don’t know where to start?
We have you covered with our teen method book series! Following the circle of 5ths your Level 3+ students will gain comfort in a variety of keys while mastering scales, triads, chords and left hand accompaniment patterns using motivating “pop study” pieces, improv, sight-reading, rhythm duets and lead sheets! Pair the technique book with the matching repertoire book for an “all in one” lesson experience for your teens! Find them on Amazon here.
I love your blog SO much! Every single time I read it I take away invaluable information for my piano students. I’ve shared it with my colleagues at Good Sam Arts as well. Thank you for sharing your experience – it is making me a better teacher 🙂
Quick question: have you taught any group piano classes? We have an introductory class with 4-6 kids in it at a time – the idea is that they spend a semester there as they learn the basics and see if they have an affinity for the instrument before their parents invest in a one-on-one lesson (90% of our students are one-on-one). What would you consider the most important skills that could be taught in a group setting in that first semester? Progress is slower but some of them immediately take to it.
Secondly, do you approach an adult beginner significantly differently in terms of the curriculum and the skills introduced, than you would a younger student?
Thanks again!!
Hi Mandi – so happy to hear you are enjoying the blog!
These are two big questions – probably best answered over email 🙂 Did you want to pop me a message and I’m happy to write back (andrea@teachpianotoday.com)
Wow! Everyone has such great ideas, here! Thanks for sharing. I do love the idea of using the “real” fingering also. I always start with the pentascales, and call it “Walking the Dog” and they sing “Walking up the street back down again” After they’ve learned all of the Maj. scales, I assign them the “5-up” scales for a couple of weeks, and have them start at the lowest C on the keyboard, play the scale, hit C again saying “5-up” (thus hearing that interval), bringing them to G, (now how many #’s?), play G, finish, say “5-up”, bringing them to D, and so on. They always find it fascinating that they finish on C with the final “5-Up” (Only a pentascale for F), thus completing the Circle of 5ths. (Which has already been introduced, and we follow the chart). Then we review hands together in “In-A-Row” scales, just simply playing all the scales, one after the other. Lastly, I have them pull a popsicle stick w/ a tempo, articulation, dynamic, etc. and have them play the scale to match that. The favorite is playing them in a syncopated rhythm. Thanks, for all of your hard work, Andrea and Trevor! (Oh, and minor scales get the same treatment.)
Hey, Andrea!
I LOVE the idea of using the “real” fingering for the 5-finger patterns! I am definitely going to do that! 2 questions:
1. Do you use the “real” fingering for the black-key patterns as well? For example, C-sharp major would be RH 2-3-1-2-3 and LH 3-2-1-4-3? I feel like that seemingly random 4 would throw people off, but I could always explain that that’s how it’s going to have to be “later.”
2. Do you think it would be a good idea to also have the kids learn the first 5 notes of the descending major scale, in order to drill the opposite fingering? For example, C major would be the regular CDEFG, but then have them start with C on top, going CBAGF so they’d be doing 1-2-3-1-2 in their LH? I guess that would get confusing with any other key besides C major/A natural minor, because then they’d have to learn more than just the 5-finger pattern. So maybe just do the first way until they know all of the 5-finger patterns, and then maybe have them practice this “opposite” way when they first get introduced to 1-octave scales? I hope this makes sense….. Your thoughts??
Hi Morgan – glad you found an idea you could use 🙂
1. Yes, once students are comfortable on white key pentascales then we head right into black key ones (again… I don’t like to “save” them to give the perception that they are difficult). I keep these hands separate for a long time to avoid frustration, but the muscle memory is still being built by HS.
2. Yes yes yes! Once they know the pentascale from the root up then you can teach them from the root down (Left hand first and then hands together – this time the right hand is the “easy one). Breaking scales up into these small chunks is a great way to avoid years of fingering issues. Some kids just “get it” and for those kids it’s not always necessary, but if you have a struggling learner then this is a great approach.
I have been having a problem knowing when to introduce scales to students. Some of them move so slowly through a method book that they won’t get to scales until they’re teenagers (which I don’t think is a great idea)! Over the last year I’ve been introducing pentascales to everyone who’s not playing scales, and starting scale study with those who need it for exams. At what age do other teachers start scales? Do you start them even if they’re not there in the method book, yet, or even playing pieces in different keys?
Hi Lisa – This is a question we are asked a lot. I start scales right away – I think it’s good for finger dexterity. I also introduce key signatures before method books do because (again) I don’t want to give the perception that they are “scary” by saving them. If you start with pentascales then even your little ones can begin to build their library of scale knowledge. If you make it into a little “quest” to be able to do all the way from C to G on the white keys then you’ll find that most kids actually *like* playing them!… and what a favour you’ve done them for future learning 🙂
Great tips! I use the printable “Muscle Builder” technique books from The Playful Piano blog. They are wonderful! There are several levels and I start them when students are in the primer level so they are learning pentascales, arpeggios and chords for all the white keys from the beginning. Then they advance to learning major/minor pentascales, cross-hand arpeggios, and so on. It keeps building their technique skills gradually which I love. And the books are fun with lots of cute graphics- my students seem to enjoy their “muscle builders!” I like the tip of changing pentascale fingering, though. This would make it much easier to transition to learning the full scales!
Hi Kylie – thanks for sharing! Yes… I always “crinkled my nose” at having them use a different fingering for pentascales than they will be using for an octave scale… it just didn’t make sense. This way you’re actually using a scaffolding approach to teaching scales so it’s more streamlined 🙂 Thanks for commenting!
I LOVE teaching technique (and theory)!
I like your point about introducing scales that may seem harder early. I always teach the pattern for major scales and I prefer to use the circle of fifths. I also teach how to find the relative minor scale, then how to form the harmonic and melodic minors. I also prefer to work ahead in technique, learning above recommended requirements for levels.
I love teaching it too LOL – geeking out with you Paula 😉
My students had a hard time remembering WWHWWWH. So we say We Were Happy When We Went Home. As soon as a scale is introduced, I send them out the door saying, “We Were Happy When We Went Home!”
Don’t know why I never thought of a cute little slogan for that! Thanks!
Awesome mnemonic Karen! Thanks for sharing 🙂
Brilliant!
I teach “marshmallow stars” every other year to all who know the alphabet. Using the circle of 5ths I start with the C scale and write it out in their homework book. CDEFG…with RH fingering on the top and LH fingering on the bottom.
They have to memorize the scales and get two tries each week with a marshmallow on the back of their hand. If the fingering is correct and the marshmallow doesn’t fall off they get a marshmallow and a star on the wall chart.
The children love it.
So cute Susan! Thanks for sharing and yes… I can see this being a big hit 🙂 If you turn anything into a game it automatically becomes much more enjoyable!
I teach scales quite soon and definitely in the first year. I’ve found most of my students are eager to do them, especially when they’ve had older siblings play them at home. Their ears are ready for it! The thumb-under isn’t a problem…just make a “tunnel” with finger 3 and “drive the car” (thumb) through the tunnel. Mostly I teach using the Circle of 5ths which all my students draw in the back of their notebooks and we add the keys as we learn them. They love the math of it all and many have even figured out mathematical patterns on their own with it, i.e. “Oh,even the order of sharps is in 5ths”, or “even the relative minors or in 5ths,” etc. When we learn a scale with different fingerings, other than the C – E maj. fingerings, I write the beginning finger numbers next to the key on the Circle, such as B-flat, 3-4. The left is on the left and the right is on the right. I have them write out their own scales or help me if they’re younger, but always use the WWHWWWH pattern to do it first and write the letter names., then transfer to the staff.
Sometimes I teach a scale as it pertains to a new piece, especially the minors. When I ask what key a piece is in according to its key signature, it’s an opportune time teach why C major can also be A minor. (“See all those A’s? See all those G-sharps? Hear how it sounds?”).
The relevancy part is the trickiest part to me and I like your ideas on playing the creativity games with them. I need make more time to do more improvising!
Great blog as always! Thank you!
Hi Linda – thanks so much for sharing. I too agree that teaching scales soon is a good idea and yes, kids LOVE the fact that there is a pattern to scales, and that there are rules and that there is math in it! It’s like a secret treasure map 🙂 Thanks so much for sharing – I love how you relate the scale to a new piece as well. Cheers!
Great Blog post!!!
I definately do not follow the lesson books scales, they wait WAY too long before they teach them. A lot of my students will start scales when they learn Joy to the world =) because it’s easy for them to see why scales are important. I always teach in the same order C, G, D, A, E, B, F, Bb, Eb, Ab, Db, Gb (then I explain they have already learned Cb, F#, C#) and once we have learned all the majors, we start learning the minors. I also teach the Chord with the scale, C chord gets learned with C scale, ect… (chords are another great example of why scales are important)
I love the composition or improv ideas. I do the improv with my older students, but what a great idea to tie the current scale they are learning to a self composition!! Thanks
Hi Cheri – thanks for sharing your experiences!
Hello Andrea, can you give a bit more detail about how you improvise with the student with the new scale they are learning? I think it’s a great idea, but if you can provide 1 or 2 examples for how you choose the LH pattern you play, and how you instruct the student on what keys to use to make it sound good together, that would be great. Thanks!
Hi Elaine – if you are a PianoBookClub member you’ll get a book ALL about this this month as February’s book is a beginning Improv book! 🙂 Really, the sky is the limit – simply give your student either a rhythm or a set of notes that he or she can use (improv is easier in the beginning for kids if there are some constraints). Your student can either then just repeat this pattern over and over with each new measure, or you can choose two or three different “chunks” (For example, play half notes on the tonic and dominant, play quarter notes that step up, play a 4-beat melody using notes in any order) that rotate or that your student can choose from. Again… the PianoBookClub book is a great resource if your’e interested in starting this 🙂
I also greatly appreciate this blog post, I was just about to start teaching pentascales, and I was going to use the traditional 1 2 3 4 5 fingering, but your approach to teaching the “right” scale fingering for pentascales makes much more sense! Thanks again for all of your great posts and advice!
Hi Elaine – wonderful! Yes, I’ve found that it avoids future confusion nicely 🙂 Those kids who are flexible don’t seem to mind the fingering change, but some kids find it to be confusing and frustrating (and so eliminating that possibility is always a good idea!) Thanks for your comment!
Through my own studio experience, I have found that beginners love learning scales because they feel such a sense of accomplishment. The ones who have started early and have a positive attitude go on to have a positive attitude toward tchnique in general. Students who come to it later (transfer students, for example) see tchnique as a chore and drudgery.
I love the idea of marshmellow stars for beginners! And I will start using scale fingering for pentascales. Except I will use it simultaneously with 1-2-3-4-5 because that makes a good finger exercise ….and if they are doing a Prep B exam, they will have to play a pentascale. The two methods could be taught concomitently I think!
I tell my students that learning their technique teaches them the geography and ‘language’ of each key. Then when they are playing a piece, their fingers become at home in whatever key they happen to be in. I want them to know there is a reason for doing all of this.
Great points Sandra – thanks so much for commenting!
I’ve found Kristen Jensen’s Piano Scales Make Piano Magic a great resource when teaching penta scales. Quite often, youngest beginners have spaghetti fingers and concentrating on fingering takes away from playing with the proper hand and finger technique. I put a huge emphasis on technique at the start and have found that even a 4-yr-old can quickly learn great hand and finger technique if I don’t overload them with too many other details. As soon as they learn their first 5 note scale and open chord, they compose their first “song.” I alternate the circle of 5ths so that by the time they know C F and G scales and chords, they are composing using the first five notes of the scale and they know to start and end on tonic. Once the IV chord is introduced, I encourage that they play F with the IV so that no matter which notes they choose, it always sounds great. I have a 5-yr-old who is able to play the five note scale on any white and almost all the black keys after one year. As soon as a student is ready for the full scale, I explain that the fingering changes for 8 note scales and they switch with no problem. Sometimes it takes a year for the youngest ones but most are playing 8 note scales and chord inversions by age 7 and learning the importance of composing based on the scales. They beg to learn a new scale and chord so that they can color the fish provided in Jensen’s book and we hang them on a bulletin board with their name on it. Once they play the full scale and chord their fish is double matted with a star on the card and they are always excited to join the elite “Inversion Club.”
Hi Andrea,
I really like how you suggest using the original finger pattern for scales. I dislike changing on the students after their fingers have already become accustomed to the five finger pattern, especially kids who love routine. I plan on using this technique. I introduce scales in the circle of 5th order. When I learned them in college, I found it was easier to remember because of the pattern of adding a sharp to each scale, and taking them away in the flats. I feel that I can teach scales better in that way. Thank you for all your wonderful ideas. I definitely plan to implement these.
Hi Andrea – glad you found it useful! Yes, I find using the intended finger pattern right from the beginning really helps 🙂 Thanks for reading our blog!
Hi Andrea, thanks for this insightful post. I’ll try the new pentascale fingering with my new students!
One question about which order I should introduce scales and related triads: should I introduce a bunch of scales first, then a bunch of related triads, or introduce each scale with its related triads?
Thanks!
Hi Miriam – I introduce the triad along with the scale so they can make the connection between the two more easily. For little ones just doing pentascales, I just teach a root triad (solid and broken) to begin so they can find the correct accidentals etc before starting on inversions.
Thanks, Andrea – I’ve been introducing all scales, then all triads, but that makes sense to connect the dots for the students and introduce them together!
Thanks for the Blog. I’m constantly asking myself the question; “Is there something I’m missing, or some teaching technique that I should be using to help my students progress faster with their scales”. So, your blog is helpful in that I’m doing everything you mentioned… I like the Circle of Fifths, because C-E are all the same fingering. B-C# are all the same (I teach 2-3 on the group of two black notes, 2-3-4 on the group of three black notes and thumbs on the white notes (somewhat applicable for B)), and Ab – Bb are extremely similar, and then F is it’s own anomaly of the “C fingering” but backwards on the right hand… So, I like the systematic way you can navigate the fingerings around the Circle of 5ths. Now, if I could just somehow make learning scales exciting and cool it would make all the difference in the world…