A while back we shared a handy little DIY device to help collapsing finger joints called the “Fingercise Cup”. It quickly became a piano teacher’s go-to tool for helping students develop finger strength and fix collapsing fingers joints.
Today we’re sharing another great little DIY project that will help your beginning piano students with several of the most common “beginning student issues”:
- Finding a natural, curved hand shape
- Learning to play with curved fingers
- Developing finger independence and dexterity
- Memorizing finger numbers
Button Gloves (which I stumbled on here while surfing Pinterest) are simply gloves with small buttons fixed to the end of each finger. As soon as I saw a pair pop up on Pinterest, I knew I had to find a piano-related purpose for them! And so I did 🙂
The 9 activities I’ve described below will benefit young piano students by encouraging a natural, rounded hand position, reinforcing naturally curved fingers, and improving dexterity and finger independence.

How To Make Your Own Button Gloves
Making a button glove is easy (Hey… if I can do it, so can you!) You will need:
- A pair of small child-sized gloves
- 10 buttons (two of each color, one set of 5 for each hand).
- Glue or a needle and thread. I was able to find button stickers at Dollarama!
Attach the buttons to the finger on each glove, being careful to place them in the spot where a student should generally strike a piano key.
Why Use Button Gloves?
Buttons work really well for encouraging curved fingers and a rounded hand shape.
Why? The flat surface of the button provides a tactile way of feeling when the finger is curved correctly. For the entire surface of the button to rest flat against a surface, the finger needs to be in a “good piano hand” shape. The aural “tapping” of the button further reinforces this handshape as it works best when the correct finger curve is found.
When you have a beginning student on the bench, have her put on the gloves and complete these activities. Each activity should be completed so that the button face taps, rests, or is placed squarely on a flat surface, encouraging a rounded hand shape.
9 Fun Ways To Use Button Gloves
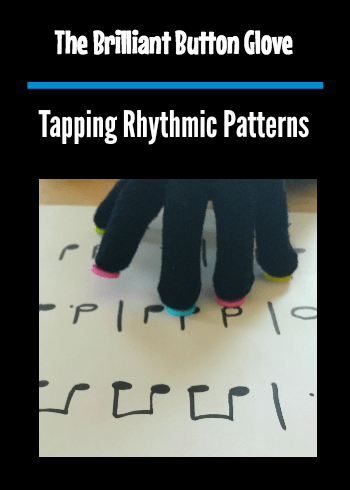
1. Draw several measures of rhythm on a sheet of paper. Call out a finger number and have your student tap the rhythm using the correct finger. The trick to this activity is keeping the other button surfaces/fingers “stuck” to the flat surface… encouraging a curved hand position while isolating just one finger at a time.
1. Fill a piece of a paper with colored circles that match the colors of the buttons on the glove. Have your student slide her hand around the paper, stopping to tap each colored circle using the matching finger. Ensure the button faces/fingers not being tapped remain flat on the paper’s surface.
2. Fill a piece of paper with the numbers 1 through 5. Have your student slide her hand around the paper, stopping to tap with the matching finger to each number while using a curved finger to allow for the entire button face to contact the paper.
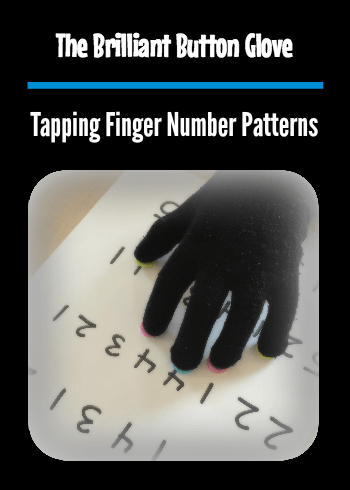
3. Draw several lines of number patterns using numbers 1 through 5 (for example: 1 2 2 4 5 3 1). Have your student tap the corresponding fingers to match the pattern while keeping the other button surfaces “stuck” to the flat surface.
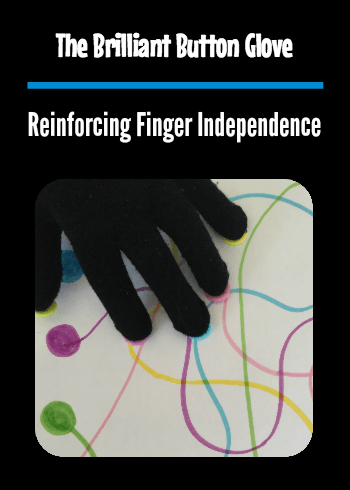
4. Using colored markers that match each button color, draw swerving lines across a sheet of paper. Have your student match a button color to a line color and “trace” each line from start to finish while maintaining a curved hand position.
5. Have your student turn her hand palm up. Call out a color and have her touch the button on her thumb to the button on the corresponding finger so that the button faces line up and touch squarely. This activity is great for finger flexibility!
6. Call out two finger numbers and have your student tap back and forth between those two numbers (for example 2 4 2 4 2 4 2 4). Can she maintain a steady rhythm while ensuring the entire surface of each button taps?
7. Have your student place both of her hands in a natural curved shape so that each button face is touching a flat surface. Call out a finger number and have your student tap the corresponding fingers on both hands at the same time… while the other fingers remain on the flat surface.
8. Call out intervals and have your student use a curved hand shape while playing the two fingers that would make up the interval. For example, if you called out “third” your student could tap either her 1 and 3 fingers, her 2 and 4 fingers, or her 3 and 5 fingers. Ask her to be sure that both buttons tap at exactly the same time.
9. At the piano, call out a note name and a finger number. Ask your student to tap the corresponding finger on the corresponding note while keeping a curved hand shape.
Strong Visuals Mean Lasting Impressions!
It can be difficult to correct hand position once a piano student has reinforced poor habits. Starting off with a strong teaching visual leaves a lasting impression that will stop these common issues before they start. Give it a try… we’d love to know how it works for your students!
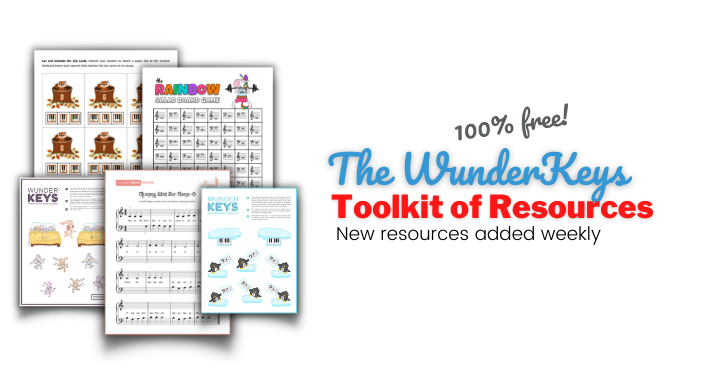
Searching for more off-the-bench fun?! Check out the WunderKeys toolkit where we share hundreds of free piano lesson games, activities, and resources. Sign up for free and instant access here.
Utterly brilliant…thank you! I’m off to buy some gloves now – I need to try this with a young student this afternoon…
Hi Elaine – the best part is it literally takes minutes to make one! I’m going to start sending home a pair with all new students who start 🙂 Kids think they look cool too!
Great, imaginative idea. Hoping to try it out!
Thank you,
Karen
I love this idea!!! Going to the store this morning to get some gloves and buttons! Thank you so much for sharing this!!
I teach piano to blind students at our state school for the blind and it is always a struggle to get my students to curve their fingers and keep them curved. I cannot model for them for obvious reasons! I cannot wait to try this with them. Guess what I will be doing this weekend!?!
Wow, this is PERFECT for your situation! Wish I could watch.
This is so neat Phyllis – you can really feel it with these gloves when you find the “sweet spot” of a naturally curved hand so I’m thinking this might really work in this application! Let us know how it goes 🙂
Thank you for sharing such a an elegantly brilliant idea! I look forward to trying this soon!
Thanks for reading Sally! 🙂
This is genius! Thinking how to involve ” breathing” wrist with these activities.
Brilliant, indeed! I can’t wait to incorporate this. I have several kiddos in mind!
This is SO timely! I’ve wracked my brain to be creative in giving visuals, etc, to some students to TRY to help them remember to get a correct hand position! The hardest ones are the ones who have to learn on a keyboard and not an acoustic piano! Thanks AGAIN!
Hi Judy – this might just do the trick. It really works well for tactile learners… it’s like a lightbulb goes off! Just watch for that bent first finger joint in kids who really struggle (they can still manage that with these gloves even) – and if they’re having issues with that try the fingercise cup first.
I can’t wait to try these with a few of my students. Nothing seems to have worked so far in getting them to maintain a proper hand shape but this just might do the trick.
Hi Yvonne – excited to hear how it works for you!
Another wonderful idea from Andrea! Hope I can find gloves to buy at this time of year! So eager to try this on students whom I should have cracked down on earlier in their studies!
Hi Jan – usually dollar stores still have them! If not, Amazon.com sells a set of 12 for $20. http://www.amazon.com/FoMann-Children-Wholesale-Rainbow-Assorted/dp/B00NMRU7G0/ref=sr_1_2?ie=UTF8&qid=1460734004&sr=8-2&keywords=magic+gloves+kid+size
What a great idea! When I first saw the title for your post, my first thought was a L-O-N-G glove with buttons on each joint from middle finger, to wrist, and on up the arm…I am working on “un-twisting” the hand position of a few of my little students, and have been using stickers on their hand/arm for a visual. So you see, you have given me TWO ideas today! I am so thankful for your never-ending imagination!
I can’t wait to try this. Thank you!!
I’m wondering about when they take the gloves off and play the piano after doing these exercises. Will they expect to keep all the other fingers in contact with keys, as they are keeping all the other fingers in contact with the surface in these exercises?
Two other visuals I have thought of trying have been taping something rigid to a wrist to prevent extreme flopping of the wrists and putting a soft ball in the palm and doing some ecercise with it there.
I really love these ideas! I have a 6 year old student who is just going to love doing some of these, especially following the squiggly lines. But they look like so much fun that I think they will be a great demand with all of my younger students!
What a great idea!!! I can’t wait to try this! I like your idea of sending a pair home with new students.
I cannot wait to make this for my daughter! She and I just finished the Wunderkeys method books and are now moving onto The Music Tree. I have a feeling she will love this for her first few lessons at least! Thank you! Such a simple but brilliant solution!
Oh my goodness. I cannot wait to use this on my transfer intermediate students. I have quite a fewolder students who have been playing for years with other teachers and then they come to me and still have flat fingers. I’ve tried a lot of stuff, but this looks amazing! Thank you, thank you, thank you!
I would love to see some printables to go along with this! I don’t know how I missed this post back in April; I thought I had read all of them.
Very late to the party…I finally had a chance to read this post in its entirety. Brilliant idea, BUT…I’m stumped as to where to place the button on the thumb. In the pictures the button is on the tip of the thumb just like the buttons on the rest of the fingers. However, due to the hand’s anatomy the side of the thumb rests on the keys when placed in the proper hand position. The only way for the tip of the thumb to rest on the keys like the other fingers is to awkwardly roll the thumbs towards the index fingers and bend them, or bend the wrists up, both of which are improper hand positions.
Good point, SonicPiano; I think I’ll skip #6 exercise and put the thumb button on the side of the thumb
Ah, so glad I re-found this post! My daughter (6) is advanced for a normal 6 yr old, but she has trouble keeping a curved shape and is VERY sensitive about being corrected and will shut down if I say anything about her have shape. I knew there were some fun activities I’d read about to help fix this problem! I think #9 will be especially good since it’s usually the pressure of pressing the key down that causes the finger collapse.